Showing posts with label Vegetarian. Show all posts

Tuesday, April 7, 2015

Mexican Corn Salad

GUYS.  We're back.  It's been awhile. I know, I know.  Sorry about that.  Hopefully you missed us as much as we missed you.  We have lots of cool homey and hungry posts to catch up on...including this one.  If you love corn (or even remotely like it) this recipe is for you and my veggie loving friend Caitlin.  I cheated and used canned sweet corn (whatever, it's fine) and it came out super awesome and took me a total of 10 minutes to throw together. BOOM.  Back at it. 

We were invited to an Easter lunch on Sunday and after cooking all of my usual Easter staples on Saturday, I wanted to make something a little different to bring.  Enter: cool, crunchy, creamy, spicy, and refreshing Mexican Corn Salad.  Perfect as a spring or summer side dish, if I don't say so myself. 


It's super easy to make. Diced red onions, green onions, jalapenos, canned sweet corn (or fresh if you are impressive and have time like that), feta, and finished with a light, bright creamy lime dressing. It's more authentic to use cotija cheese, but I thought feta was a little lighter and a little tangier.  I'm also obsessed with feta right now.  So there's that.


After tossing all of the ingredients together, let it chill in the fridge for about two hours.  The flavors all come together and create this spicy and sweet awesomeness.  Damn.  I wish we had leftovers.


Here's the recipe!

5 Cans Whole Kernel Sweet Corn (15 oz Cans), drained well 
1/2 to 1 Jalapeno, seeds removed and diced 
1/4 Cup of Red Onion, diced 
1/4 Cup of Green Onions, diced 
1/3 Cup of Crumbled Feta 
1/2 Cup of Mayonnaise 
1/2 Cup of Sour Cream 
Juice from 1 Lime 
1/4 Tsp Kosher Salt*

Mix together the mayonnaise, sour cream, and lime juice and then incorporate to the rest of the ingredients.  Let chill in the fridge for two hours before serving.  The dressing sets at the bottom, so toss again before serving and serve cold.

*I went really easy on the salt since it was going to be served with salty Easter ham.  Season to your tastes.

Stay hungry!

Tuesday, October 29, 2013

Heirloom Tomato Quiche

I know it's a bloggerly thing to love fall.  Pumpkin spice everything, autumn wreaths, babies in pumpkins.  But as much as I enjoy fall (and I really do!), I'll always love summer more.  Maybe I'm feeling especially nostalgic for summer this year because I had a long wonderful chunk of time off with Will or maybe it's just because I've heard that the Farmer's Almanac is calling for a brutal winter around here.  Either way, I'm clinging to the last bits of summer wherever possible and this time, it comes in the form of late-season tomatoes.

I made up a quiche late last night (hence the lack of in-progress shots) using some beautiful heirloom tomatoes.  It was very easy and turned out super tasty.


Here's what I used:

1 pie crust (I used store bought.  Sorry, Mom)
3 medium tomatoes
4 eggs
2 cups of shredded mozzarella cheese
1/4 cup parsley
1 cup half & half
salt & pepper to taste
1/2 teaspoon herbes de provence

I preheated the oven to 350, then rolled out my crust into a pie plate.  I still have yet to buy a real quiche dish from last time I made one but a pie plate worked just fine.  I took about a third of the cheese and sprinkled across the bottom of the crust, then added a layer of tomatoes, followed by more cheese, more tomatoes, and then the last of the cheese, all the while sprinkling in a little salt, pepper, & herbes de provence.  In a separate bowl, I whisked the eggs together with the half & half, then poured it all evenly over the tomatoes & cheese and baked the quiche for 50 minutes.

It reheated beautifully the next day and was a hit with Jesse & my mother.  Served with a salad, a small slice of this tasty quiche made a perfect lunch that tasted like summer, even though the leaves are all almost down outside.


Enjoy and stay summery hungry!

Tuesday, September 10, 2013

Use Up That Zucchini

Jaisa mostly handles the food-related posts around here, but on a homey front, my garden is OUT OF CONTROL.  Squash galore.  I let things grow a little too long.  My zucchini could double as baseball bats.  Here are two that came in with this morning's harvest:


I've been scouring the web for tasty looking zucchini recipes that'll use up these giants without making it feel like we're eating the same dish meal after meal.  Here's a collection of delicious, varied zucchini recipes that'll help you finish off your garden bounty or farmers' market haul.

1) Chocolate Chip Banana Zucchini Bread

via Grey Luster Girl

This recipe from Grey Luster Girl combines my love of banana bread (one day, I'll share my grandmother's delicious recipe) and chocolate chips with my need to get this zucchini off my counter.  I'm planning on baking this up (along with some mushy bananas) sometime this week for a tasty snack to have around the house.

2)  Baked Zucchini Chips

via The Boot

How delicious do these look?  Check out the recipe.  I will definitely be adding the red pepper flakes for a bit of spice!

3) Zucchini Brownies

via Movita Beaucoup

I have to admit, I'm a bit skeptical here.  These look so decadent, but they're made with zucchini.  Jessica Seinfield I am not.  I like my brownies made like brownies.  But the recipe looks legit and the pictures make me want to eat them right up.  I'll need to give it a shot.

4) Goat Cheese & Zucchini Tartlets


These make me wish I were hosting a swanky brunch sometime soon.  Maybe I am.  Can you come over on Sunday?

Anybody else have some zucchini recipes to share?  Any suggestions on what to do with these beasts (besides pick them earlier)??  Let me know and stay hungry!

Monday, August 26, 2013

Cheesy Tomato Oil

HI GUYS.  Sorry for the brief delay.  We missed you. 

I was in Maine a couple of weekends ago and my Mom made the most delicious food ever.  It was a compilation of all my favorites - lobster, more lobster, sausage and pepperoni bread, this ridiculous blueberry cream cheese crumble dessert that I'll post about on Wednesday and THIS.  Let me just tell you what THIS is.  It's tomato oil, according to my Mom.  She's a freak of nature and just whips stuff up like this and doesn't really realize how genius some of her simple creations are. Olive oil, San Marzano tomatoes, cheese, and lots of garlic.  I can't tell you how incredible this is.  You'll just have to take my word and make this stat. 


So there's the quick way and there's the long way.  I've had them both and knowing how impatient I am, I think I'll make it the quick way from now on.

You can either get a large can of San Marzano tomatoes or you can get a jar of your favorite pasta sauce.  Rao's is amazing and is packed with flavor already.  If you go the traditional (long way) you need to simmer the sauce for a long time in the oven.  Like for 45 minutes to an hour...at least. So just get a good sauce that's already been simmered low and slow and call it a day.


Before adding the sauce, add the olive oil, thinly sliced garlic and red pepper flakes to your serving dish. Simmer in the oven for 10 minutes to infuse the oil.


Next add your sauce (be careful because the oil is hot), mozzarella, Parmesan, and basil and pop it back in the oven for another hour or so, or if using a jar of pre simmered sauce, just cook until heated through, about 20 minutes at 400 degrees.


Take it out of the oven and let it cool for at least 10 minutes before serving.  If you can.  Charlie swooped in at about 3 minutes into cooling time.  Serve this as is with a loaf of crispy crunchy bread, like a french baguette.


This is soooo delicious.  Soooo savory and soooo easy to make.  My Mom made like twice this much and just left it on the counter.  It was basically gone in 4 hours.


This is going to be my new go to company dish.  It's communal, soul satisfying, rustic and yum.

Here's the recipe: 

1/2 Cup Extra Virgin Olive Oil
1/2 Tsp of Red Pepper Flakes
2 Garlic Cloves, sliced very thin 
1 Large Can of San Marzano Tomato Puree (or a jar of your favorite marinara sauce) 
1, 8 oz Container of Fresh Mozzarella Cheese (cherry size) 
1 Cup of Freshly Grated Parmesan Cheese 
5-6 Leaves of Fresh Basil 
Fresh Crusty Bread

Preheat oven to 400 degrees.  Add garlic and pepper flakes to oil and heat in the oven for 10 minutes to infuse oil. Add tomato sauce, both cheeses, and basil. If using San Marzano tomatoes, simmer in the oven for 45 minutes to an hour.  If using a jar of marinara sauce, you can cut the simmer time in the oven to 20-30 minutes. Serve with fresh crusty bread that's been heated slightly in the oven and enjoy!

Stay hungry!

Tuesday, February 12, 2013

Freezable Vegetarian Meals

Jesse and I both work from home, so we go out to eat frequently because often neither of us has left the house by 5 PM on a workday, save for a walk to the mailbox or an occasional coffee run (going out to eat "frequently", mind you, is a change from our Brooklyn lifestyle where we went out to eat or ordered in delivery nightly).

With the upcoming arrival of our firstborn (referred to locally as "bebe"), I understand that we are going to be homebound for a while and will need to have some prepared food at the house.  We live in the sticks, so delivery isn't an option out here.  The internet and my experienced mom friends all suggest making meals in advance and freezing them, which seems easy enough until I realized that most recipes I can find for freezer friendly meals seem to be meat-based. 

Here is a round up of some meals that would freeze nicely, are vegetarian, and would make a great meal rounded out with a simple salad (or eaten on their own at 3 am):


1.  Smitten Kitchen's take on Thousand Layer Lasagne (with spinach) -  I've made fresh pasta from scratch before (here's Jaisa's tutorial btw) and have a pasta attachment for my KitchenAid.  Time to spend an afternoon rolling some lasagna sheets.  This would freeze beautifully and reheat easily.


2.  Delightful Repast's Vegetarian Quiche - With quiche, you want to cook it ahead of time, let cool, and then freeze it.  I will be making this veggie-packed quiche and then cutting into individual servings before freezing in foil.


3.  Most Mac & Cheese will freeze nicely.  I'm including the picture above (Toasty Mac and Cheese from Real Simple) because I thought it was hilarious that Real Simple suggests those smoothies as "similar recipes".  Kale Apple Smoothie... Mac and Cheese that calls for 5 cups of whole milk... totally the same thing.  (I will probably make our Gouda Mac & Cheese and freeze in single servings for quick comfort food).


4. Homemade Calzones from The Kitchn - making small calzones in advance makes perfect sense for me & Jesse because he can make up his own meat lover's ones while I fill mine with eggplant, spinach, & ricotta.  Totally beats Hot Pockets!


5.  Squash, Kale, & White Bean Soup from The Whole Life Nutrition Kitchen - for sure the healthiest of the bunch, but looks delicious and nourishing.  

As you can see, I have my work cut out for me for the next 49 (!!!) days.  Please feel free to share any freezer friendly veggie meals YOU like.  Stay hungry!

Wednesday, February 6, 2013

Low Fat Broccoli Cheese Soup

Broccoli cheese soup is so delicious.  But this could be healthy dish, is often loaded with things like cheese, butter, cream and so on.  Like my friend Katie says, it's "snow suit season,"  not bikini season, but bikini season always tends to sneak up on me like oh, I don't know, 6 months too soon.  I took a chance and gave this dish a little make over and it came out absolutely, smack your lips outstanding.  Give it a try and let me know what yous alls think.  


Here is what you'll need: 

2 Broccoli Heads, Florets Only
4-6 Cups of Low Sodium Chicken Stock (depending on how thick you want it) 
1 Large Onion, Chopped
1 Jalapeno Peppers, Diced 
4 Cloves of Garlic, Smashed
1/4 Cup of Sour Cream 
1/4 Cup of Shredded Cheddar 
1 Tbs of Olive Oil
Kosher Salt & Pepper 

Heat up the olive oil and add the onion, garlic and jalapeno.  Season with salt and pepper and saute for 3-4 minutes.  The jalapeno and garlic adds SO much flavor...which we need since we are getting rid of some of the more indulgent ingredients. 


Steam the broccoli for 3-5 minutes in the microwave just to get it going.  Add it to the pan with the onions and add the chicken stock.  


Simmer for 15 minutes or until broccoli is fork tender.  If you have an immersion blender, you can blend it right in the pan.  If not, you can puree this in small batches in either a blender or food processor.  JUST BE CAREFUL.  I have burnt myself many a times doing it this way and finally gave in and bought stole my mom's immersion blender.


Add the chhheeeeeeeeeeeeeeeeeeze and the sour cream and mix.


Taste it and give it a little more salt and pep.


Well hello there.


Yummy.  This is creamy and smooth and so GOOD FOR YOU!  Next time I'm going to try to skip the sour cream and cheddar in the soup so I can enjoy more on top. :) 

Stay hungry! 

Wednesday, December 12, 2012

Provoleta

Mmmmmm provoleta.  How do I love thee?  Let me count the pounds.


Provoleta has absolutely nothing to do with the holidays.  It's just delicious.  Oh wait!  It's red, and green and white!  It can also replace your favorite but "cheesy" holiday movie.  Ok, I'm done.

I can justify anything.  Really.  It's a talent of mine.


I love this dish because it's so communal.  You throw it down in between a crowd and people just dive in and help themselves.   I mean, what else are you supposed to do with bubbling creamy cheese.


...besides get a fork and shove some in your mouth?


This is embarrassingly easy....here we go ya'll...

1/2 inch Slice of Good Provolone (deli counter can do this for you) 
1/4 Tsp of Dried Italian Seasoning
1/4 Cup of Chopped Roasted Red peppers 
Olive Oil

If you want to do it the real way, rub the provolone with olive oil and grill it on each side until you begin to see grill marks.  If you want to do it the lazy way (insert Jaisa here) just throw it in a small casserole dish (so the provolone just fits inside) and then top with a drizzle of olive oil, dried herbs, and roasted red peps.  Bake in a 425 degree oven until the cheese begins to get hot and bubbly, which is about 8-10 minutes.  Serve as is or with a crusty loaf of bread.

Stay hungry!

Monday, November 5, 2012

Five Hungry Worthy Vegan Soups

Wait. What?

Guess who ate vegan all last week?  THIS GIRL.  Well, not the entire week.  Just Monday through Thursday, but still.  That's a big deal for a little carnivore like me.  I watched Forks Over Knives and really wanted to make a few changes, including eating more whole, plant based foods.   Charlie made it to Wednesday afternoon until he sent me a text message, telling me that he would be eating "an entire cow" for dinner.  Baby steps.  Baby steps.

It's been really chilly in Chitown lately, so here is a compilation of delicious, vegan friendly soups that are sure to satisfy.  They are also sure to shove a few more veggies into that husband of yours.

Pad Thai Soup by Domestic Fits:


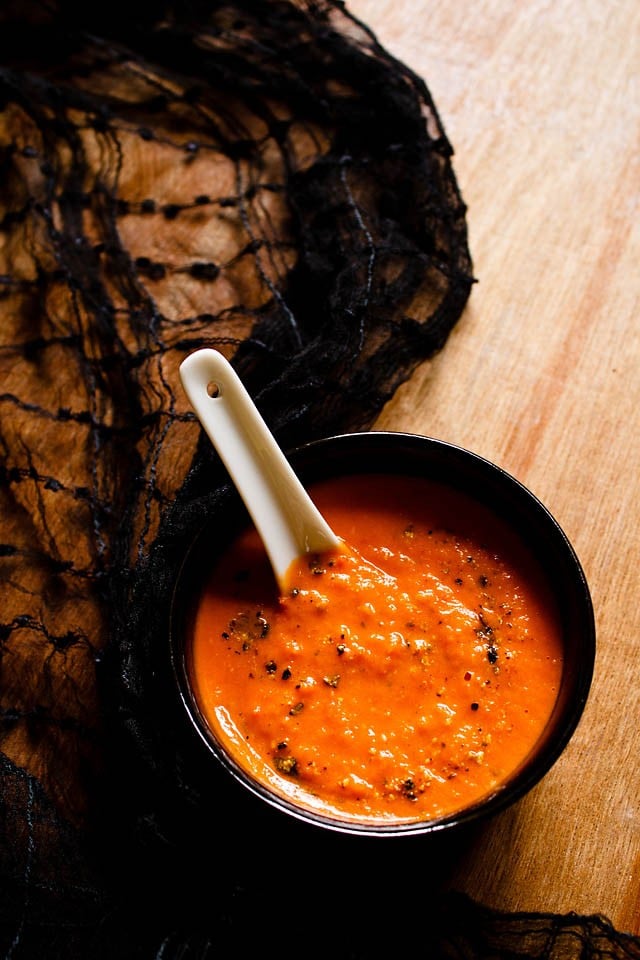
Four ingredient, Roasted Tomato Soup by Veg Recipes of India:

roasted-tomato-soup


Quinoa Corn Chowder by Weekly Vegan Menu:


Thai Vegetable Soup by Girl Cooks World:


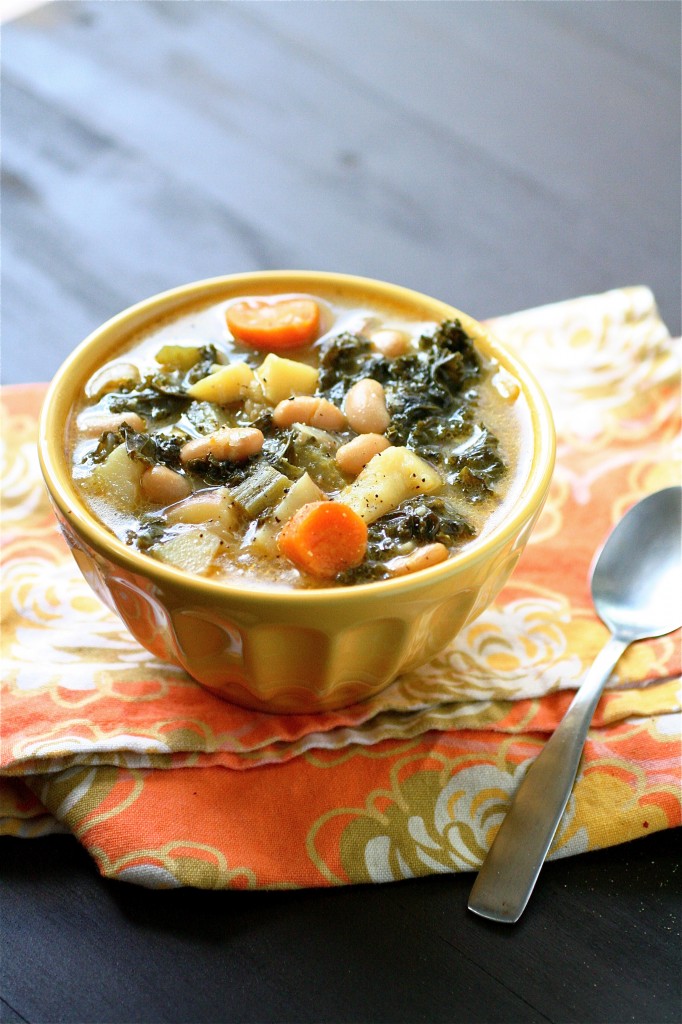
White Bean Kale Soup by The Curvy Carrot:


Drooling yet?  I can't wait to make some of these. Stay hungry!

Monday, October 22, 2012

Skinny Stuff It Veggie Wrap

When I was growing up my sister and I would get veggie wraps from a place called Stuff It.  They were incredible.  I remember texting her awhile back, asking for ideas for the blog and she challenged me with recreating the recipe.  Now let's get something straight.  We would get veggie wraps just because they tasted amazing, NOT because they were healthy.  A typical veggie sandwich from a deli has around 600 calories, 50 carbs, 30 grams of fat, and very little fiber.  Ouch.

We can totally do better than that.


I've made my version a couple of times, base on some of her suggestions.  It has never been exactly right, but close enough.  Last weekend I made a lighter version and it came out simply amazing. Mmmm I'm looking at the above picture literally drooling.  Yum.


 Here is what you need for about 2 very large, overstuffed wraps:

1/4 Red Onion, Sliced very very thin 
1/2 Cup of Bean Sprouts 
1/2 Cup of Alfalfa Sprouts 
1/2 Cup of Pre Packaged Broccoli Slaw 
1/2 Cup of Pre Packaged Sliced Red Cabbage 
1/4 Cup of Carrots, Freshly Shredded if Possible 
2 Slices of Jarlsberg Lite Swiss Cheese, Sliced Very Thin 
2 Mission Carb Balance Tortilla Wraps 
1/4 Cup of Light Hellman's Mayonnaise 
2 Tbs of Tamari 
1 Tbs of Lemon Juice, Freshly Squeezed 

Mix mayonnaise, tamari, and lemon juice together.  Add vegetables to dressing and toss well.  Line each tortilla with 1 slice of cheese.  Jarlsberg Swiss slices are rather large so one should work just fine.  Add a large scoop of the dressed veggies to the center and wrap together, using wax paper to hold everything in place.  The point is to have an overstuffed, decadent wrap of veggies.  You could easily make 3 smaller wraps out of this if you prefer. Enjoy. 

Each wrap has 6 Weight Watcher Points.  Here is the complete info: 


Wow.  About half the calories, half the carbs, and about a sixth of the amount of fat and ALL the flavor.  Yes.  We're on to something. 

Stay hungry! 

Monday, October 15, 2012

Vanilla Bean Pumpkin Smoothie

Boy do I have a treat for you.  A trick or treat.  It's a treat that won't play a trick on your thighs.  (Sorry). 


Every time I walk into Starbucks this time of year, I'm bamboozled with delicious smelling, very high caloric wafts of pumpkin temptations.  Pumpkin Latte.  Damn you.  Damn you and your 13 grams of fat and 49 grams of sugar!  


I was craving something pumpkiny, but also cold.  So I came up with this concoction and BOY IS IT YUMMY.


It's also super easy to make.  Here is the recipe for two servings:

1/2 Cup of Canned Plain, Pure Pumpkin Puree (not pumpkin pie filling!)
1/2 Cup of Fat Free Greek Yogurt
1 Cup of Vanilla Almond Milk, Unsweetened
1/2 Tsp of Ground Cinnamon
2 Tbs of Honey
1 Vanilla Bean, Seeds
Small Pinch of Sea or Kosher Salt
2 Handfuls of Ice


Split the vanilla bean down the middle and scrape the seeds out. Add vanilla seeds and rest of ingredients to a blender.  Blend on high until mixed well.  Add more almond milk for a thinner smoothy or add more ice to thicken it up.  If you don't have vanilla beans or don't wish to go through the trouble of looking for them, just use 3/4 teaspoon of vanilla extract.  

Only 4 Weight Watchers points and TOTALLY satisfying.  Here are the complete nutrition facts:


Yum.  Totally yum and totally skinny biotches.  Stay hungry!

Wednesday, October 10, 2012

Swiss Chard Pouches with Fresh Mozzarella and Tomato

I want more cookie dough dip.  I mean mmmmm doesn't this Swiss Chard contraption look good???


I'm kidding.  Really.  This was awesome.  I saw this in a cooking light magazine and knew I had to try it. You know those times when all you can think about is ooey gooey cheese but you're trying to take it easy?  You know for me it's from, like, 6:45am to about 3:59 am.  Well, anyway, this is an excellent alternative.


This is what you'll need: 

1 Large Tomato, Sliced Thin
1 Large Ball of Fresh Mozzarella (includes a few snacking while cooking pieces)
2 Large Swiss Chard Leaves, Rinsed 
Olive Oil
Sea or Kosher Salt
Balsamic (get a good thick, syrupy one)


You want to soften the leaves up so they become pliable.  You could simmer them in boiling water, OR you can save a pan from being washed and just pop the leaves in a microwave for 20-30 seconds until they begin to wilt.  Next, you want to cut out the stem and then cut the leaves in half, lengthwise. 


Next, get a slice of tom and a slice of mozz and roll 'em up. 


Brush each side with olive oil and sprinkle with sea or kosher salt. Add them to a grill pan that's been heating up over medium high heat.  Spray a little cooking spray to ensure they don't stick.  Grill each side until cheese begins to melt.


Drizzle with some good balsamic vinegar and rejoice. 


Mmmm...yum.


Low carb and loads of flavor.  This is something I can get behind.  Stay hungry!